Headers, footers and table of contents
Return to the video alternative.
Header and Footer
- Headers and Footers can be used to hold document information but should never hold important document content such as filename, document owner etc. As screen readers don’t read it out this information should also be within the content of the first page or the last page.
Creating a header or footer
- Under the ‘Insert’ tab, select ‘Header’ or ‘Footer’:
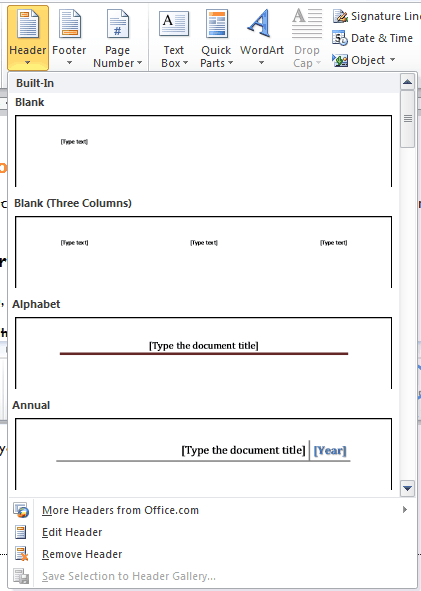
- Insert text or other document information required.
- Use section breaks if you require no header or a different header on the title page.
- Always include page numbers in the footer with the ‘Normal’ style.
Table of Contents
- Place the cursor in the document at the place where you would like the table of contents to sit.
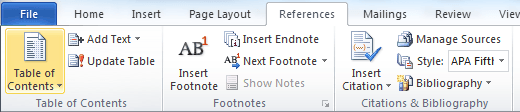
- Select the ‘References’ tab and then ‘Table of Contents’.
- If you have used standard styles (Heading 1, Heading 2 etc.) then you can create an Automatic Table of Contents.
- Alternatively you can select ‘Insert Table of Contents’
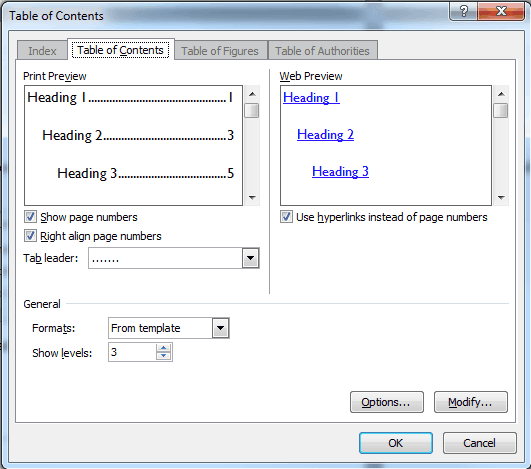
- Ensure the ‘Tab leader’ option is ‘………’
- To change which styles appear where, select ‘Options’.
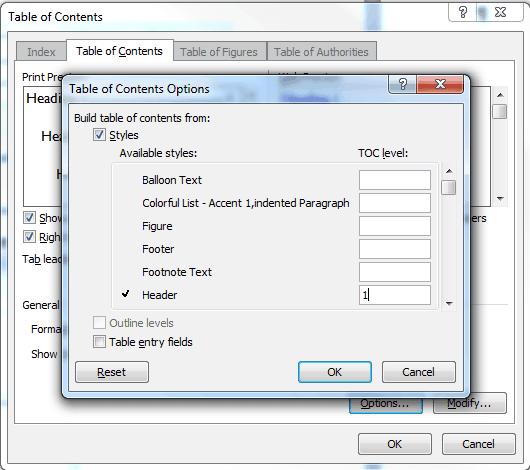
- Number each style in the order you would like to see it in the Table of Contents.
- Select ‘Ok’ twice.