How to create tables

Return to the video alternative.

Tables

Create a table

  1. Under the ‘Insert’ tab, select ‘Table’.

The insert tab is selected in the Word navigation. The Table dropdown is activated so show the insert table options which include manual selected how many columns and rows or by choosing from the following options; Insert table, Draw table, Convert Text to Table (not selectable as no text is highlighted), Excel Spreadsheet and Quick tables.
Figure 46: Insert Table
  1. Select the relevant number of cells.
  2. Never use the ‘Draw Table’ option.
  3. Never nest tables within tables.

Format a data table

  1. Ensure that tables are not nested.
  2. Select the entire table.
  3. Right-click on the table or use the ‘Layout’ tab to select the ‘Table Properties’ option.
  4. Select ‘View Gridlines’. This will show the table borders as a dotted line

The Table options are available in the Word navigation as the table is selected and so the layout tab is open. A circle indicates the location of where the 'view gridlines' option is. It is located in the first available options in the layout tab.
Figure 47: Selecting ‘View gridlines’
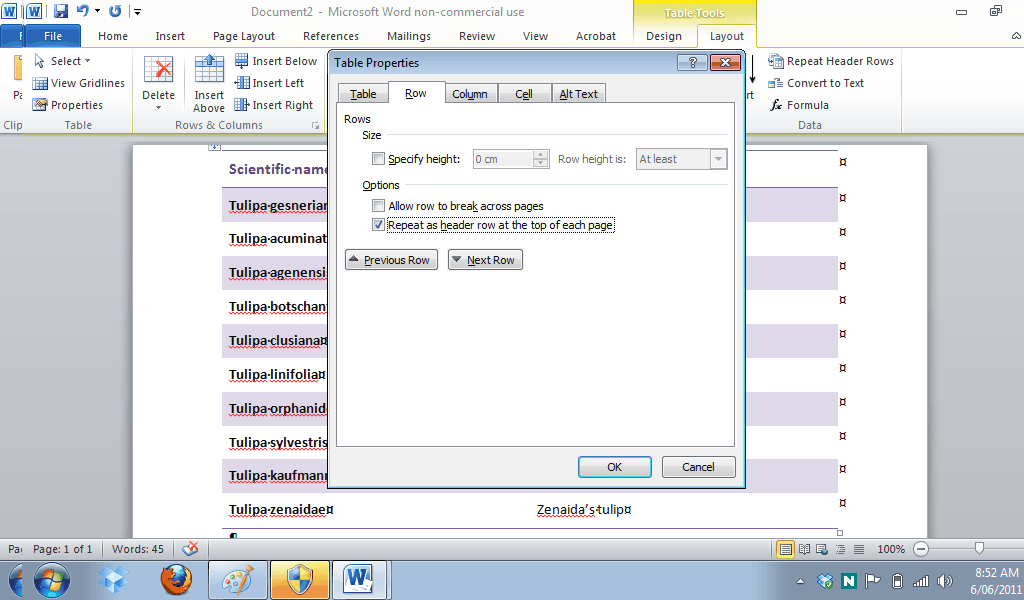
  1. Turn off the ‘Allow row to break across pages’ option in the row tab of the ‘Table Properties’ dialog box to ensure rows do not break across pages.
  2. Where a table runs over two or more pages ensure the ‘Repeat as header row at the top of each page’ is enabled.

The table properties dialog box is activated as a pop up. The row tab is selected and under the options section, the second checkbox 'Repeat header row at the top of each page' is enabled.
Figure 48: Table properties dialog box

Format a layout table

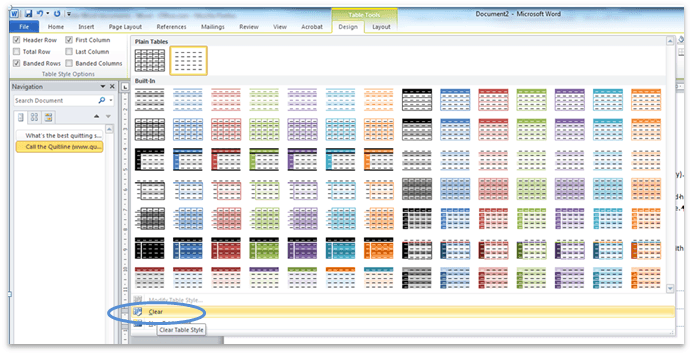
  1. Put your cursor in the table.
  2. Under the ‘Table Tools’ section, select the ‘Design’ tab.
  3. Select the right drop-down arrow in the Table Styles section.

The Design tab is activated from the table tools. The position of the drop down arrow is shown in the table styles section located in the far right corner below the scroll bar for the styles.
Figure 49: Table Styles
  1. Select the ‘Clear’ option.

The table styles are expanded after the drop down arrow has been selected. This also shows a list of table options after all the possible styles. The 'Clear' option is circled which is the second item in the list of options.
Figure 50: Clear Table formatting
  1. Ensure the layout table makes sense when linearised by tabbing from cell to cell and checking that the content makes sense and reads as intended.

Borders

  1. Under the ‘Home’ tab, select the Border option and select the relevant border.

In the Home tab of Word navigation. The borders dropdown is activated located in the Paragraph section.
Figure 51: Create a border
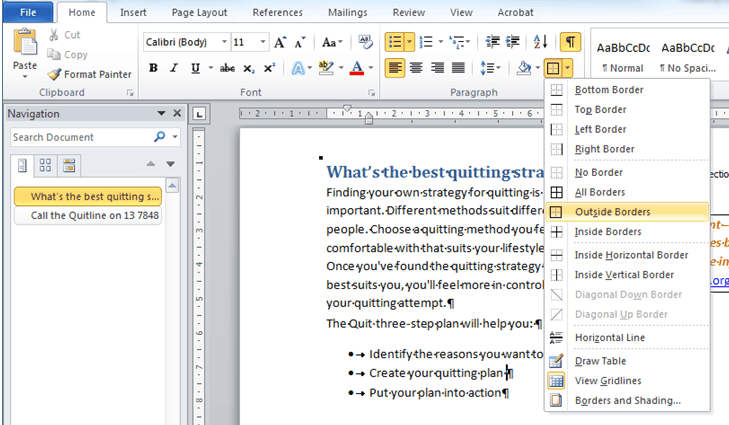
  1. To modify the colour and weight of the border select ‘Borders and Shading’.
  2. Do not choose any of the dotted line options, as these are converted to images without alternative text when saving as PDFs.

The borders and Shading options. The setting is on 'None' with a plain line style being applied to Paragraphs.
Figure 52: Create a border
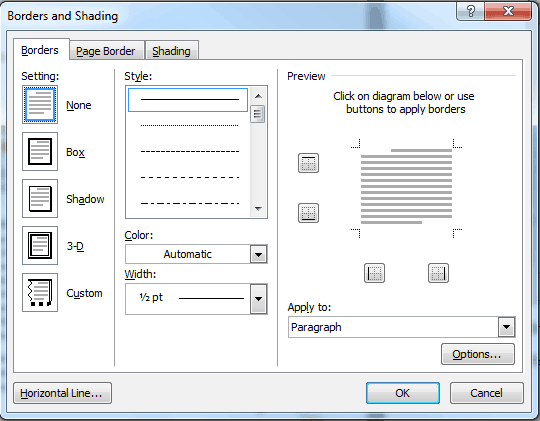
  1. Under ‘Setting’ select ‘Box’.
  2. Select a relevant colour from the ‘Color’ option.
  3. Select a relevant weight from the ‘Width’ option.
  4. To change the spacing between the border and the text select the ‘Options’ button.

The Borders and Shading box with the 'Borders and Shading options' selected which gives you more specific options to change the widths of the borders by each line.
Figure 53: Border and Shading Options
  1. Change all options (‘Top’, ‘Bottom’, ‘Left’ and ‘Right’) to 14pt.